How To - Managing Products
Summary
iOrder allows customers to order products in real time via a website or mobile application.
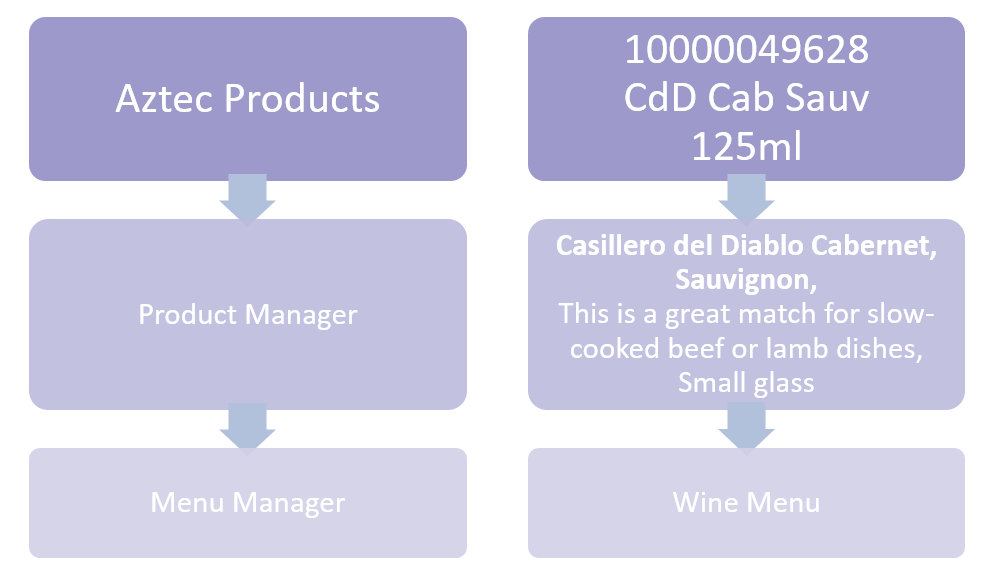
Aztec data forms the baseline in iOrder of all product data, however it is not ideal for presenting to customers; Product Manager allows you to add customer friendly names and data to products.
Remember: Product manager can also be accessed through Menu Manager.
Aztec Data Import
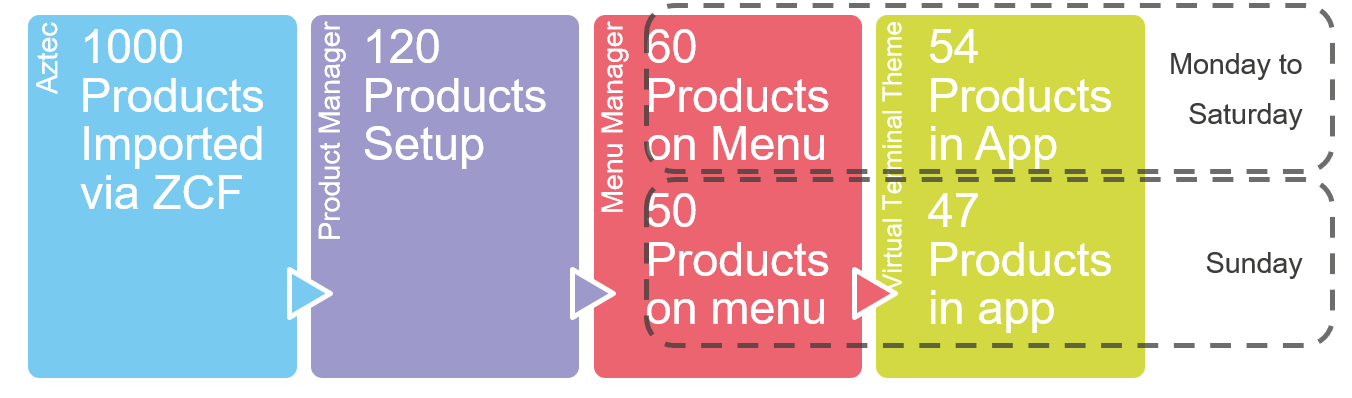
All products in Aztec are imported into product manager via the Zonal Connect Framework (ZCF). The import process is normally carried out on a daily basis.
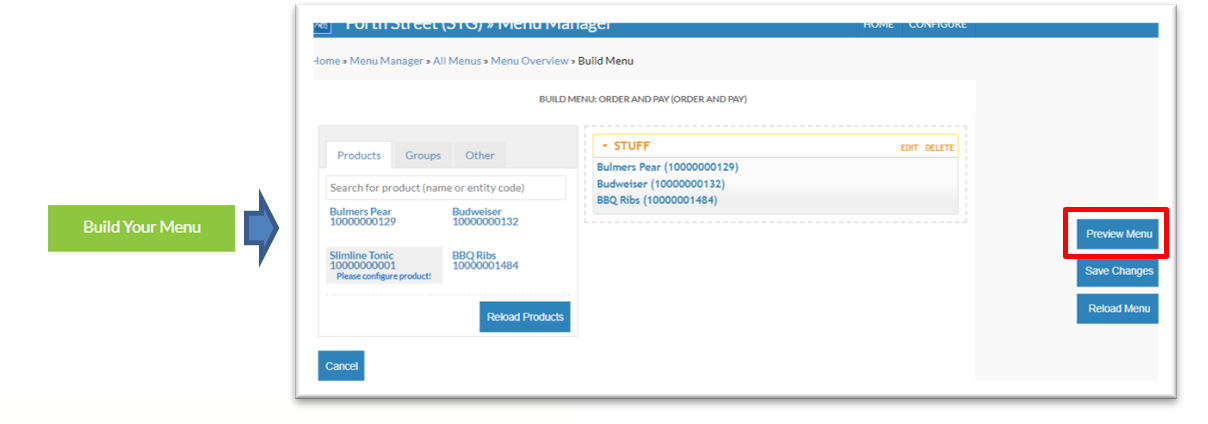
Products can then be setup in Product Manager and given customer friendly data and meta data. Menu Manager is then used to create a list of products to display to the customer. When a customer uses the application, the products on the menu are cross referenced with the Virtual terminal at site for availability of products and prices.I
Items imported are: Products, related choices, portions, courses & site names.
Pricing & Promotions
-
Pricing and promotions are not imported into product manager.
-
Pricing is applied when a customer connects to a specific sites’ virtual terminal.
-
Promotions are checked before the checkout process
Configuring Products
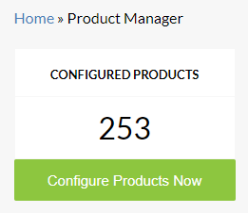
Here you can view the number of products imported, configured and when the data was last synchronised. There is also an activity log showing what has been changed/added/updated and by who.
To edit or review products, select “Configure Products Now”
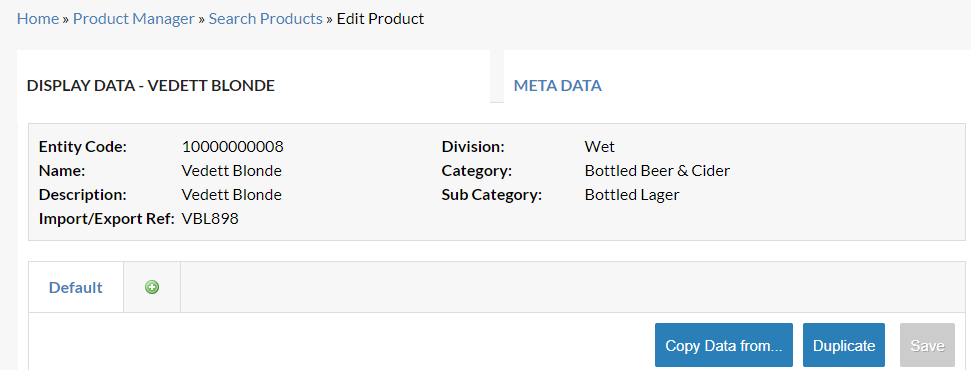
A full list of products will be displayed. Products listed cannot be deleted from this list as Aztec holds the master list of products.
You can search for a product by either; Entity Code, Name, Import/Export Ref or via Aztec Category/Sub-Category. When you have found the product you wish to configure select the product. This will then display the record for that product, including the entity code, name, description, import/export ref., division, description and categories from Aztec.
Adding a record
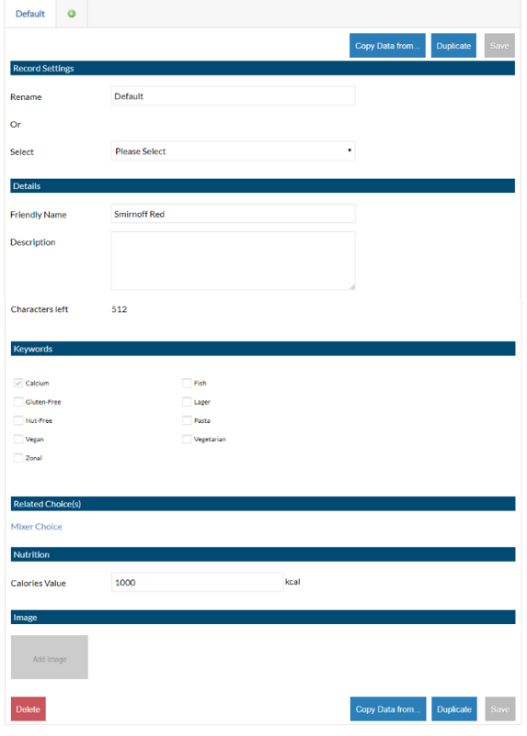
An unconfigured product will not show any records. To add a record, select the green + button shown at the bottom of the display data for the product. You can also copy data from another product or duplicate this record into the same product. Remember to press Save when any changes have been made, this will show up in orange when you make changes.
Record settings
Each product can have several different display records. For example; Default, Sunday menu, Christmas menu. The Friendly name, description and image and be defined differently for each record. This is potentially for a dish to be used across multiple menus where you can choose the different display name/description but still sell the same product.
The default record name is “Default”. You can define a new record name by renaming or selecting an already used record name.
Details
Friendly name: This is the product name that is displayed to the customer.
Description:Here you can enter more information about the product. This will display in a menu to a user.
Keywords
Keywords allows for better search results by a customer. For example, lasagne might not be listed under pasta in the app but it can be added as a keyword, so it appears in the search.
Add/Edit Keywords
To add/edit keywords, go to ‘Keywords’ in Product Manager.
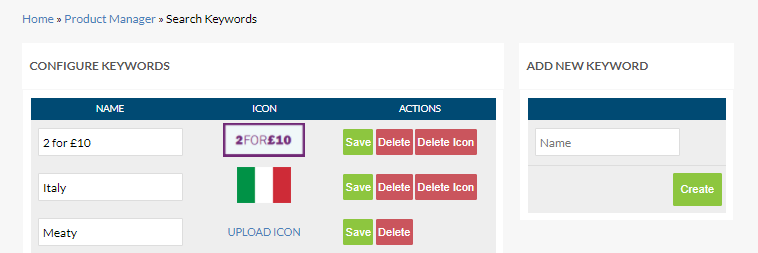
To add a new keyword head to the Keywords module in Product Manager, enter the name of the keyword in the box provided and select Create.
To add or replace an icon, select the Upload Icon link or select the existing icon, browse to the required icon and select Open.
To delete an icon, select the appropriate Delete Icon link.
Select Save to save your changes to a single keyword or Save All to save all changes on this page.
Related Choices
If the product has choices linked to it in Aztec, then they will be displayed here. You can click on the choice to configure the customer friendly names for the choices. These can also be configured globally shown in Global Choices section below.
Consider the customer when adding friendly names, you may wish to use the same name as a physical menu so there is no confusion between items. The description can be up to 512 characters long. If using the maximum amount of characters for all your products, you might find that the menu in the app is very wordy and sometime too much for a customer to take in. It would be useful if this was supplied by your marketing team in advance of menu builds. Aligning the descriptions to a physical menu can help customers to make a like for like comparison.
Meta Data
Adding meta data allows you to add additional information to a product. Meta data can only be set up by product and not a display record. This can be found under the Meta Data Tab when editing a product.
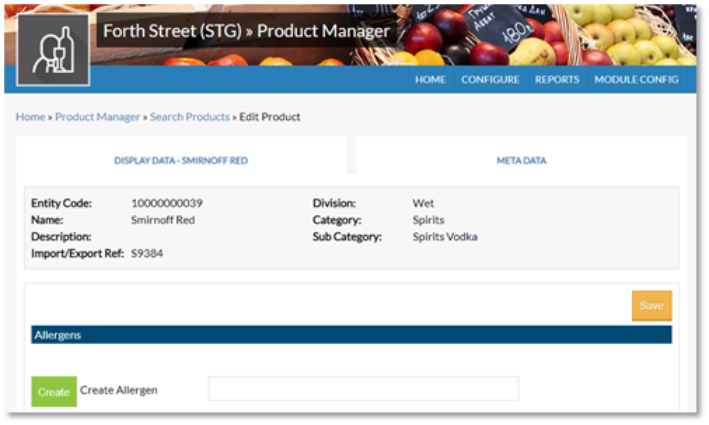
Allergens
You can add a list of allergies that this product could trigger. The use of this information may differ depending on the application. You can add allergens in the meta data tab, or you can create them through Product Manager, Configure > Allergens. In here you can add allergens with a description both will display in the same way.
Courses
The default course and give the option for the customer to select the course themselves. If this is turned off, then the default course will always be used.
Override portion(s)
Age Restriction
This is set to “Use Aztec Default” as default but this can be overridden in the meta data to 18, 21 or 25.
Global Portions

You may wish to change the friendly name for a portion globally for all products. Portions are used in products this could be for example the size of a glass of wine – Small 125 ml, Medium 150 ml and Large 250 ml, again these are pulled through from your Aztec setup. After selecting Product Manager on the main menu, select “Portions” shown on the right side of the screen.
All the Aztec configured portions will be displayed. Select the portion you wish to give a friendly name and press edit.

To add a record then select the green + button.
Just like products you can add a friendly name and description for each display record.
If you change the portion for a specific product then the global name will be overridden.
Global Choices
When choices are setup in Aztec across many products then you can assign friendly names to the choices without having to define them in each product. A choice for example could be Pizza Base the choices being – Deep Pan, Thin and Crispy or Gluten-Free.
To define choices globally then in Product Manager select “Choices”.
This will then display all the choices imported from Aztec. To add a record then select edit
To add a record, select the green + button. You can define a Friendly name for the choice in this example the friendly name would be “Bread Selection”, or “Choose Your Bread”.
Each related product has a friendly name and description. This means that options can be explained fully to a customer. Help with uploading images can be found in the Media Manager section.

Friendly Names and Descriptions are usually supplied by your Marketing Team; suggestion is via an Excel Spreadsheet so that you can just copy and paste to reduce errors on wording and spelling. We have a suggested spreadsheet if required, just ask your Zonal Account Representative
Product Set Up Advice
Basic Product (Standard / Recipe)
-
A basic product can be either a standard line or a recipe; these products don’t have any choices but could have multiple portions.
-
The setup of basic products for iOrder is the same as a product in Aztec that will be used on the POS.
-
Just like the POS if a portion type does not have a standard price then that portion it will not display on iOrder. If the product has no standard price for any of the portions, then it will be unavailable.
Product with a choice
-
A product with a choice allows the user to select a variant on of product or provide further instruct. This may be a simple instruction on with no stock depletion or price, a steak cooking temperature for example, or a choice of items that will deplete stock but the price is inclusive or a choice of items that deplete stock and either charge the normal price for that item or charge a separate (supplementary price).
-
The setup of a product with a choice, for iOrder is the same as a product for a POS. The only restriction with the White label app is that the choice should not have multi-select enabled.
-
Just like the POS if a portion type does not have a standard price then that portion it will not display on iOrder. If the product has no standard price for any of the portions, then it will be unavailable.
Example
Amaretto 10000000071 (Main product)
Amaretto
Mixer Choice 10000000013 (Choice)
- Pepsi
- Lemonade
- Diet Pepsi
Product with a choice within a choice
-
A product with a choice allows the user to select a variant on of product or provide further instruct, but then the choice can have a choice within the selected option.
-
For example, a salad has a choice to add a topping, in the topping options there is a steak. If the steak is selected, then the cooking style would need to be picked by the customer. If the steak is not selected but another option is picked for example chicken, then the cooking style choice should not be asked.
-
The setup of a product with a choice within a choice for iOrder is the same as a normal product in Aztec. The only restriction with the White label app is that the choice should not have multi-select enabled. NB: these types of “nested” choice are not currently supported with LiveRES Events and is currently in development.
The only additional set up required is that the all options that have a child choice need to have a valid standard price (£0.00 or a positive price). Just like the POS if a portion type does not have a standard price then that portion it will not display on iOrder. If the product has no standard price for any of the portions, then it will be unavailable
Example
| Main Product | Parent Choice | Child choice |
|---|---|---|
| House Salad 10000000465 |
Protein choice 10000000465
|
Dressing choice 10000000465 -Blue Cheese -Ceasar -Lemon & Garlic
|
Product with multiple portions, only one portion has a choice
A product with a choice allows the user to select a variant on of product or provide further instruct, but the choice may only be required for selected portion types. For example, a spirit may have a portion choice of 25ml, 50ml or 70cl bottle. If the 70cl bottle potion is selected then the customer has the choice of a pitcher of mixer. Currently, for Products with a multiple portion, only one portion with a choice is not supported in the white label app.
Example
Smirnoff Red 10000000081
| Standard | Double | Bottle |
|---|---|---|
|
Smirnoff Red 25ml Mixer Choice 10000000013 (Qty 0) |
Smirnoff Red 50ml Mixer Choice 10000000013 (Qty 0) |
Smirnoff Red 70cl Mixer Choice 10000000013 (Qty 1) - Pepsi - Lemonade - Diet Pepsi |
Troubleshooting
Product Unavailable
Where a product appears as “Unavailable” in the iOrder menu, this it is typically a product modelling issue. A product being “Unavailable” is different to a product is out of stock.
| Order | Check/Issue | Resolution |
|---|---|---|
| 1 | When saving the menu in Menu Manager, products highlight in red and the menu will not save. | Have all choices options been set in Products? Set choice option (configure) and save the menu. |
| 2 | Has the choices in the product changed after the last product sync? | Add a new record to the parent product or if the choice content has changed, the do the same for this. |
| 3 | Does the product have choices within choices? If so, the child choice must have a £0.00 price | Check the setup and pricing, set a £0 price for child choices. See choice within choice example above. |
| 4 | Does the product in Aztec contain other products? | Review build of product. |
The product should be corrected in Aztec, to ensure that the changes are populated correctly then the “Product fixes” process below should be carried out. Once an iOrder menu is live then ad-hoc fixes to the missing product, pricing or product configuration can be made, but there are additional setups required to populate the changes in the iOrder menu.
Make a product fix in Aztec and send to POS
The product, theme or pricing should be updated in Aztec and send to site and the POS as usual. NB: Any changes to the product description or choice) will not update until the next day in iOrder. Prices will update as soon as the system picks up the price change.
Re-saving the menu in iOrder
Once the send to POS communication is complete, then the affected iOrder menu should be edited and saved. If any changes to the iOrder menu are needed then these should be done before saving.
The menu is then queued to be generated again in iOrder, using the changes from the site on the Virtual terminal.